


 (in order from left to right)


Heres just a few links, there are so many more. If you know of anymore definately post them for me!: http://www.ripten.com/2008/08/29/geeked-out-giant-working-snes-controller/
http://www.examiner.com/r-1875102~Four_Foot_SNES_Controller_Actually_Works__For_Shaquille_O_Neal___Modding_.html
http://gonintendo.com/?p=54269
MAKE!!! My favorite so far.
http://blog.makezine.com/archive/2008/08/worlds_largest_snes_contr.html
http://gizmodo.com/5043619/four+foot-snes-controller-actually-works-for-shaquille-oneal
http://kotaku.com/5043796/at-last--a-4+foot-snes-controller-that-works
http://www.rssmeme.com/tag/giant-snes-controller/
http://digg.com/nintendo/Four_Foot_SNES_Controller_Actually_Works_PICS
http://digg.com/nintendo/Giant_SNES_Controller_Brings_a_New_Meaning_to_Tabletop_Games
there are so many more, google around if you're curious. Also, theres a "links to this post" section that you can see a few more.
 This one shows the clamping of one of the bumper mounts. Its hinged with a single spring/ bolt at the other end.


 I used stencils made on the computer and cut on a machine to get the lettering just right. Turns out that the SNES font is almost identical to Hattenschweller, I think thats how its spelled. Its a standard font italicized. I also made a few stencils for the skateboards I'm making (the ones that say "meret"), and the Lost logo for some potential surfboard airbrushing.
 I also stenciled out the circle for the A B X Y buttons, came out pretty clean.
 I had originally tried a rubbery brush-on material for the start select, but it stuck too much on the sides when pressed.
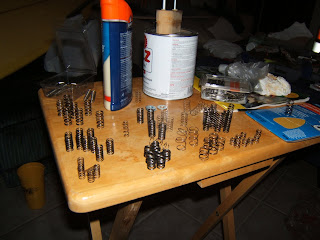
 You can see the contacts are just springs, and the other side of the contact are metal plates.


 It looks a little off here, but it actually sits straight, but it looks weird because it has to rock about the center.

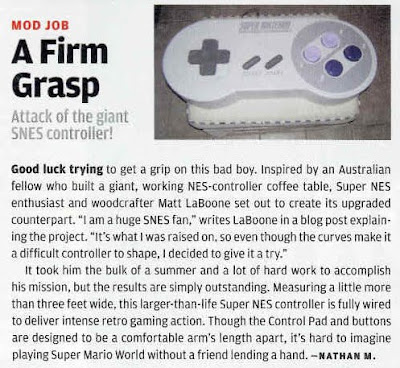
 Like the definition around the D-pad? I do.
 The plug is normal sized, and fits in a normal size SNES.


